Picture this: you’ve just baked the fluffiest sponge, whipped up a velvety filling, and then—bam—you drape it in a glossy, almost hypnotic coat that looks like it belongs in a pastry art gallery. That’s the magic of a mirror glaze cake. It’s part dessert, part vanity project, and all deliciousness. Sure, it’s a little high-maintenance (like that friend who insists on their coffee being “extra hot, oat milk, two pumps of vanilla”), but the payoff is worth it. In this guide, we’ll dive deep into everything from the best cake bases to mastering that glass-like shine, so you can turn your kitchen into a patisserie worthy of applause—and maybe a few Instagram likes.
Print
Mirror Glaze Cake – Glossy, Stunning, and Delicious
- Total Time: 1 hours 10 minutes
- Yield: One 8-inch mirror glaze cake 1x
Description
A step-by-step guide to making a perfect mirror glaze cake with a shiny, glass-like finish. Learn the ideal cake base, glaze recipe, and pouring technique for bakery-quality results at home.
Ingredients
For the Cake Base:
1 ½ cups all-purpose flour
1 cup granulated sugar
½ cup unsalted butter (room temperature)
3 large eggs
1 tsp vanilla extract
1 ½ tsp baking powder
½ cup milk
For the Mirror Glaze:
1 cup granulated sugar
½ cup water
7 oz sweetened condensed milk
12 oz white chocolate (chopped)
2 ½ tbsp powdered gelatin
Gel food coloring (your choice)
Instructions
Step 1 – Bake the Cake Base
Preheat oven to 350°F (175°C). Grease and line an 8-inch cake pan.
Cream butter and sugar until fluffy. Add eggs one at a time, then vanilla.
Mix flour and baking powder, then alternate adding dry ingredients and milk to the batter.
Pour into the prepared pan and bake for 30–35 minutes or until a toothpick comes out clean.
Cool completely, then crumb coat and freeze for at least 2 hours.
Step 2 – Make the Mirror Glaze
Bloom the gelatin in ½ cup water for 5 minutes.
In a saucepan, combine sugar, sweetened condensed milk, and remaining water. Bring to a simmer.
Remove from heat, stir in bloomed gelatin until dissolved.
Pour hot mixture over chopped white chocolate and stir until smooth.
Add gel coloring, blend with an immersion blender (avoid bubbles).
Step 3 – Glaze the Cake
Place frozen cake on a wire rack over a tray.
Let glaze cool to 90–95°F (32–35°C).
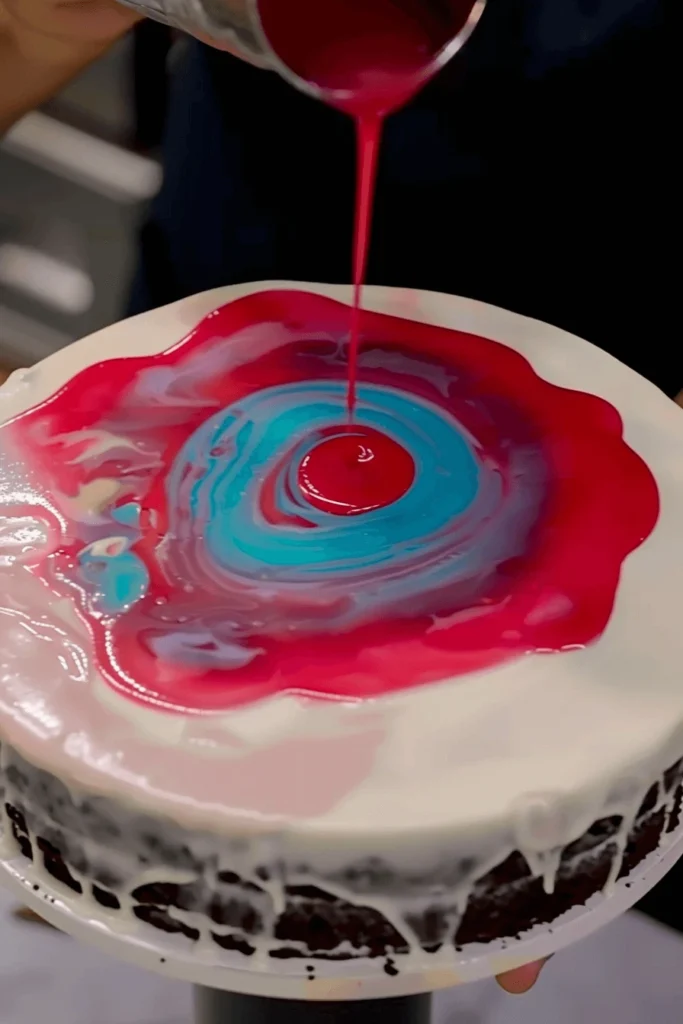
Pour glaze evenly from the center outward until the cake is fully coated.
Let excess drip off, then transfer cake to a serving plate.
Notes
Freeze your crumb-coated cake before glazing to get a flawless finish.
Use multiple colors and a swirling motion for a marble or galaxy effect.
Avoid over-mixing to prevent air bubbles in the glaze.
- Prep Time: 30 minutes
- Cook Time: 40 minutes
Nutrition
- Serving Size: 10 slices
- Calories: 420 kcal
- Sugar: 46g
- Fat: 21g
- Fiber: 1g
- Protein: 6g
Table of Contents
Introduction to Mirror Glaze Cake
What is a Mirror Glaze Cake?
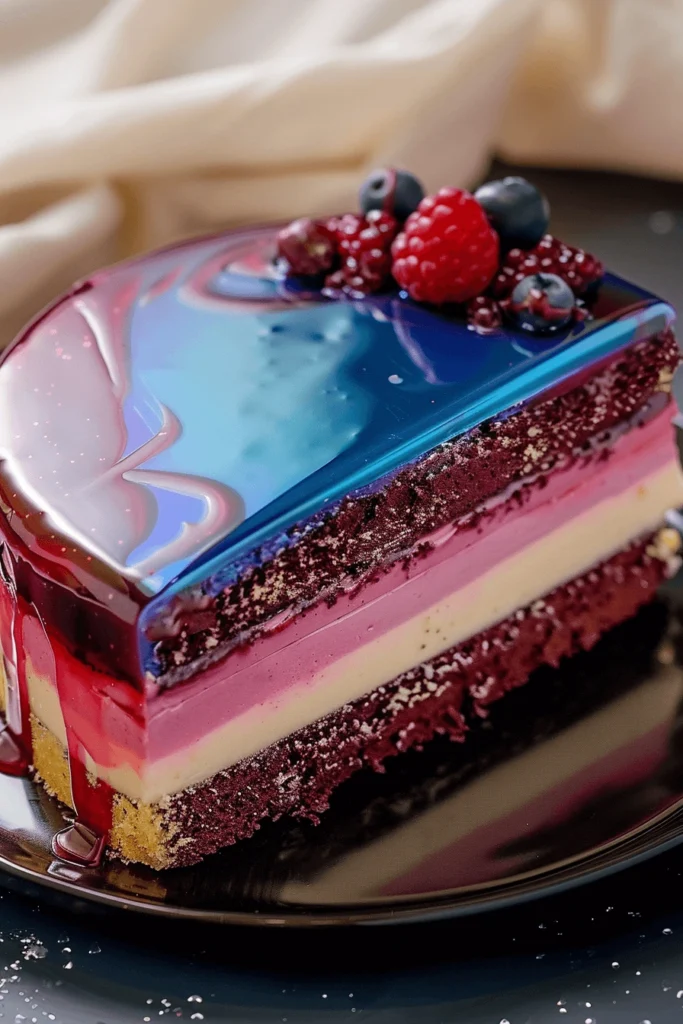
A mirror glaze cake is more than just dessert—it’s edible art. The glaze itself is a glossy, gelatin-based coating that turns a simple cake into a shimmering centerpiece. When poured at the perfect temperature, it flows like liquid glass, coating the surface evenly without streaks. This high-shine finish reflects light beautifully, making it a favorite for weddings, birthdays, and social media show-offs.
The magic happens when the glaze meets a chilled, smooth cake surface. That’s why pastry chefs take time to prepare their base cake with a crumb coat—a thin frosting layer that seals in crumbs and gives the glaze a perfect canvas.
(Looking for inspiration? Try strawberry cake and cheesecake for a fruity twist that pairs beautifully with a mirror glaze.)
The Origin and Rise of the Mirror Glaze Trend
Mirror glaze first gained global fame thanks to French pâtissiers, who turned the technique into an Instagram sensation. While the method has been around in high-end pastry kitchens for decades, the internet’s love for “oddly satisfying” videos made this technique go viral. From galaxy swirls to marble-like patterns, mirror glaze cakes have become the sweet spot between baking and artistry.
This trend isn’t just about looks—it’s also about creativity. Whether you stick to a single solid color for elegance or mix metallics for drama, the mirror glaze cake is the kind of dessert that stops conversations mid-sentence.
Choosing the Best Cake Base for Mirror Glaze
Why Sponge Texture Matters for Glazing
The success of your mirror glaze cake depends heavily on the cake base. A dense, sturdy sponge provides the best foundation because it can hold up under the weight of the glaze without collapsing. Light, airy sponges may absorb too much moisture, which can dull the shine. The crumb should be fine and smooth—think of it as the polished wall before you paint it.
Butter cakes, pound cakes, and mousse-based desserts are popular choices. Cheesecakes, when chilled properly, also create a flawless surface for glazing. The goal is to have a solid yet tender bite beneath the glaze, so the eating experience matches the visual appeal.
(Check out gluten-free carrot cake recipe if you need a base that caters to special diets.)
Best Cake Flavors and Fillings for a Mirror Finish
Since mirror glaze itself is mildly sweet with a subtle gelatin note, the cake flavor should bring the excitement. Chocolate, vanilla bean, red velvet, lemon, and berry sponges all pair beautifully. Fillings can add contrast—think tangy cream cheese, fruity compotes, or rich chocolate ganache.
It’s important to avoid fillings that ooze or shift too much under the glaze. Keep layers chilled so they hold their shape during pouring.
Mirror Glaze Ingredients and Their Role
Key Components for Perfect Shine
The signature gloss of a mirror glaze cake comes from a precise mix of ingredients—each playing a critical role:
- Gelatin: The backbone of the glaze, giving it structure and a smooth, reflective surface.
- Sugar: Sweetens the glaze and helps create that glass-like clarity.
- Water: Hydrates the gelatin and thins the glaze to the perfect pouring consistency.
- Sweetened Condensed Milk: Adds creaminess, body, and a subtle richness.
- Chocolate (white, milk, or dark): Provides flavor, texture, and a luscious finish. White chocolate is most popular because it takes color beautifully.
- Food Coloring: Turns a plain glaze into a showpiece. Use gel or powder colors for the most vibrant results.

Without one of these components, the glaze won’t achieve its iconic high-shine finish.
(Learn more about silky textures with our pistachio cream recipe—perfect for pairing with a mirror glaze.)
Alternatives for Dietary Restrictions (Vegan, Gluten-Free)
The beauty of a mirror glaze cake is that it’s surprisingly adaptable. For vegan versions, agar-agar can replace gelatin, though it sets more firmly and requires precise handling. Coconut condensed milk works beautifully as a dairy substitute, adding a slight tropical note.
Gluten-free adaptations are easy since the glaze itself contains no gluten—the cake base is the only part needing substitution. Pair a gluten-free sponge with naturally gluten-free glaze ingredients, and you’ve got an inclusive, dazzling dessert.
Step-by-Step Guide to Making Mirror Glaze
Preparing the Base Cake (Including Crumb Coating)
A flawless mirror glaze cake begins with the right preparation. Once your chosen cake base—whether chocolate, vanilla, or mousse—is baked and cooled, it’s time for the crumb coat. This thin layer of buttercream or ganache locks in crumbs and smooths imperfections, creating the ideal surface for glazing.
Chill the coated cake until it’s firm. A cold, stable cake ensures that when the glaze is poured, it sets instantly into that glassy finish every mirror glaze cake is known for. Without this step, even the most perfect glaze mixture won’t achieve its signature look.
Cooking and Coloring the Glaze for Maximum Gloss
Making the glaze for your mirror glaze cake is a precise but rewarding process:
- Bloom the Gelatin: Sprinkle gelatin over cold water and let it absorb for a few minutes.
- Heat the Base: Combine sugar, water, and condensed milk in a saucepan. Bring to a gentle simmer.
- Melt the Chocolate: Pour the hot mixture over finely chopped chocolate, stirring until completely smooth.
- Add Gelatin: Stir the bloomed gelatin into the hot mixture until fully dissolved.
- Color the Glaze: Divide into separate bowls if making multiple colors, adding gel or powdered food coloring for vibrancy.
- Cool to the Right Temperature: Allow the glaze to cool to around 90°F (32°C) before pouring—this is the sweet spot for a perfectly smooth coat.
When you pour the glaze over the chilled cake in one continuous motion, it cascades evenly, wrapping your mirror glaze cake in a flawless, high-shine layer that looks like it belongs in a pâtisserie window.
Techniques for Pouring and Perfecting the Glaze
Temperature Tips for a Smooth Finish
The secret to a perfect mirror glaze cake lies in pouring at the right temperature. Once your glaze mixture is ready, let it cool to about 90°F (32°C). At this point, the glaze is fluid enough to spread but thick enough to cling to the cake without running off completely. If it’s too hot, it will melt the crumb coat; too cold, and you’ll get an uneven, lumpy finish.
Set your chilled cake on a wire rack over a baking sheet to catch excess glaze. This setup makes cleanup easier and allows the glaze to wrap the cake evenly from all sides.
(Don’t miss our strawberry shortcake ice cream idea for turning classic flavors into a frozen mirror glaze masterpiece.)
Troubleshooting Common Glazing Mistakes
Even skilled bakers face challenges with a mirror glaze cake, but most issues have simple fixes:
- Streaks or Lines: Caused by over-stirring or pouring too slowly. Pour in one continuous motion.
- Air Bubbles: Often from whisking too vigorously. Stir gently with a spatula instead.
- Dull Finish: Usually happens when the glaze cools too much before pouring. Rewarm gently to the correct temperature.
- Thin Coverage: Means your glaze is too hot or too thin. Adjust by cooling slightly or adding a touch more chocolate.
Once the glaze has set, trim away any drips from the bottom edge for a clean, professional look. This attention to detail turns a good mirror glaze cake into a true showpiece.
Flavor and Texture – Does Mirror Glaze Taste Good?
Taste Profile and Mouthfeel
A mirror glaze cake isn’t just about looks—it’s also about taste and texture. The glaze itself is mildly sweet with a silky mouthfeel, thanks to the combination of sugar, chocolate, and condensed milk. It’s not meant to overpower the cake but rather complement it. When paired with a flavorful sponge and creamy filling, the glaze adds a delicate sweetness and a luxurious, smooth finish.
Because the glaze sets into a thin layer, it doesn’t have a chewy or sticky texture. Instead, it melts quickly on the tongue, leaving the star role to the cake beneath.

Balancing Sweetness and Flavor in the Glaze
The best mirror glaze cake strikes a balance between sweetness and flavor depth. Too much sugar in the glaze can make it cloying, while not enough can leave it tasting flat. Using high-quality chocolate (especially white chocolate for coloring) ensures a richer taste.
You can also infuse flavor directly into the glaze—think vanilla bean paste, espresso powder, citrus zest, or even subtle liqueurs. These additions can elevate the cake from simply beautiful to unforgettable.
For fruit-forward cakes, a hint of lemon juice or tart berry puree in the glaze can cut through sweetness and brighten the flavor. For richer, chocolate-heavy cakes, adding a pinch of sea salt to the glaze enhances complexity.
Mirror Glaze vs Other Glazes and Ganache
Glaze vs Mirror Glaze – What’s the Difference?
A standard cake glaze—like a simple sugar or chocolate glaze—adds shine and flavor, but it’s usually thinner, less reflective, and doesn’t create that glass-like finish. In contrast, a mirror glaze cake uses gelatin, condensed milk, and chocolate to create a thicker, ultra-glossy coating that’s both decorative and protective.
While a regular glaze might be applied warm and absorbed slightly into the cake, a mirror glaze sits on top, preserving its vivid colors and designs. This makes it perfect for showstopper desserts where presentation is key.
(Check out our cookie monster ice cream for another visually playful dessert idea.)
Mirror Glaze vs Ganache – Choosing the Right Finish
Ganache, made from chocolate and cream, is rich, dense, and velvety. It gives cakes a luxurious mouthfeel but lacks the high-reflective sheen of a mirror glaze. While ganache is often used for more rustic or indulgent cakes, a mirror glaze cake is about creating a polished, artistic effect.
If you want deep, rich flavor with a softer look, ganache is the way to go. If you’re after maximum visual impact and a contemporary pastry-shop vibe, mirror glaze wins every time. In fact, some bakers combine both—using ganache as the crumb coat beneath a mirror glaze for the best of both worlds.
Decorating and Customizing Your Mirror Glaze Cake
Using Patterns, Swirls, and Metallics for Artistic Touch
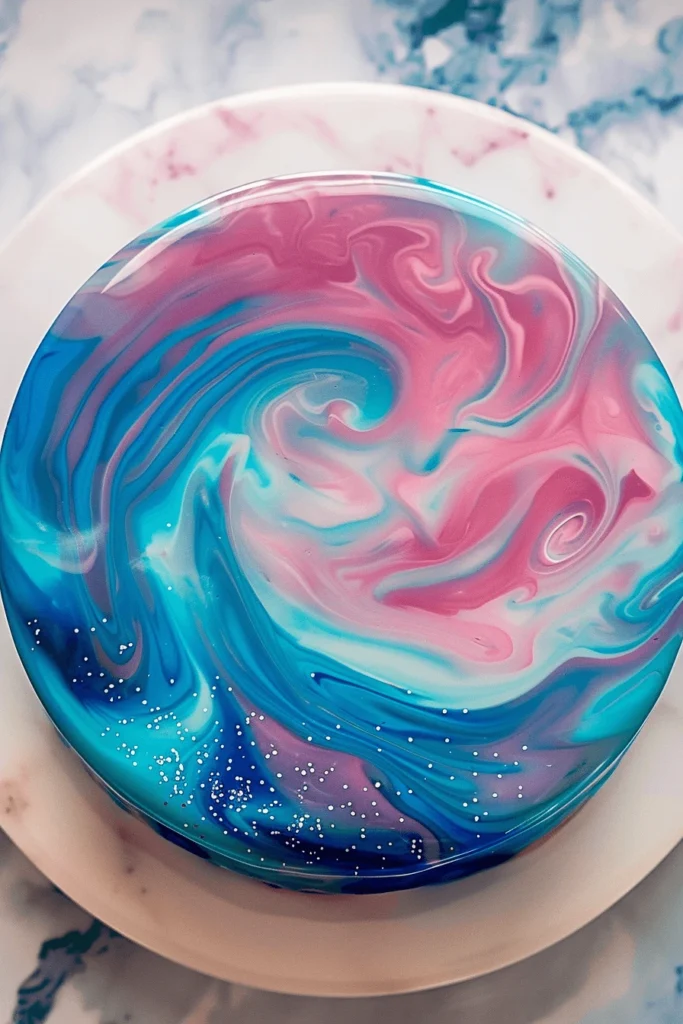
One of the best things about a mirror glaze cake is that it’s a blank canvas for creativity. Once your glaze is at the perfect temperature, you can pour multiple colors at once to create intricate swirls or marble effects. For a dramatic look, alternate light and dark tones so the patterns stand out.
Metallic finishes—using edible gold dust, silver leaf, or bronze shimmer—can add a touch of luxury. Just remember, less is often more; a hint of sparkle can make your cake look refined rather than overdone.

Layering Colors for Galaxy, Marble, and Ombre Effects
Galaxy designs are a favorite in the mirror glaze world. By combining deep blues, purples, and blacks with specks of edible glitter, you can create a cake that looks like a slice of the night sky. Marble effects are achieved by lightly swirling complementary colors with a spatula after pouring, while ombre designs fade gradually from one shade to another.
When creating these effects, timing is everything. The glaze must still be fluid enough to move but cool enough to hold the design once it sets. This balance ensures your mirror glaze cake keeps its crisp patterns until serving.
PART 9: Storing, Serving, and Presentation Tips
How Long Does Mirror Glaze Last?
A mirror glaze cake is best enjoyed within 24–48 hours of glazing, as the shine is at its peak during that time. While the gelatin in the glaze helps preserve its glossy finish, humidity and refrigeration can cause it to lose some of its mirror-like quality over time. Store the cake in the refrigerator, loosely covered, to protect it from condensation and unwanted odors.
Serving Tricks to Preserve Shine
When it’s time to serve, remove the cake from the fridge about 20–30 minutes before slicing. This takes off the chill and allows the flavors to bloom. Use a warm, sharp knife for clean cuts—run it under hot water, then wipe between slices to prevent glaze smudges.
If transporting a mirror glaze cake, keep it in a sturdy cake box with a non-slip mat underneath to prevent sliding. For events, display the cake in a cool, shaded area away from direct sunlight to maintain that glassy finish as long as possible.
Presentation is just as important as taste. Pair the cake with a sleek cake stand, minimal decorations, and maybe a scattering of edible flowers or chocolate curls for a professional look.
Frequently Asked Questions About Mirror Glaze Cake
1. What type of cake is best for mirror glaze?
Dense, smooth-textured cakes like sponge, pound cake, mousse-based cakes, and cheesecakes are best for a mirror glaze cake. These hold their shape well and provide a flawless surface for the glaze to adhere to.
2. Does mirror glaze harden?
Yes, mirror glaze sets into a firm, jelly-like layer when chilled, but it doesn’t become hard like candy. It remains soft enough to slice through easily.
3. What is the difference between glaze and mirror glaze?
A standard glaze is usually thinner and less reflective, while a mirror glaze uses gelatin, chocolate, and condensed milk to achieve a thick, ultra-shiny finish.
4. What is the difference between ganache and mirror glaze?
Ganache is a rich blend of chocolate and cream with a soft, velvety texture, while a mirror glaze is glossy, smooth, and made for high-impact visual appeal.
5. Do you crumb coat before mirror glaze?
Yes, a crumb coat is essential for a mirror glaze cake. It seals in crumbs, smooths the surface, and ensures the glaze flows evenly.
6. Do mirror glazes taste good?
Absolutely. A mirror glaze is mildly sweet with a silky texture. While its primary purpose is visual, it complements the cake’s flavor beautifully without overpowering it.
Conclusion
A mirror glaze cake is the ultimate marriage of pastry artistry and indulgent flavor. From selecting the right cake base to mastering the glaze’s temperature, every step matters in achieving that flawless, reflective finish. While the process may feel meticulous at first, the satisfaction of presenting a dessert that turns heads is unmatched.
Whether you stick to a classic single-color shine or experiment with galaxy swirls and metallic accents, the mirror glaze technique is a skill worth adding to your baking repertoire. Once you’ve nailed the basics, you’ll find yourself experimenting with flavors, patterns, and creative designs that are as fun to make as they are to eat.